Installing Plastic Soakaways
In times gone by, soakaways consisted of large pits filled with hardcore, stones and gravel. The problem with this arrangement was that over time, soil particles were inevitably washed down into the spaces between the stones, filling the voids and rendering the soakaway useless.
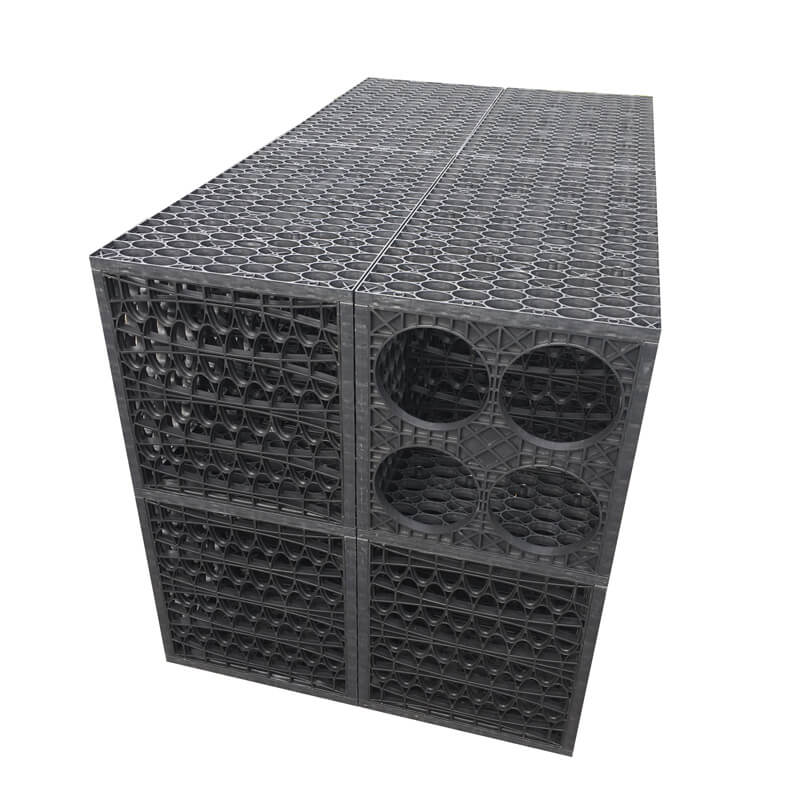
 In recent times much better soakaways have been constructed using modular water storage cells, often referred to as water crates due to the fact they closely resemble the old style plastic milk crates. With water management an ever-increasing factor for developers, homeowners and Local Authorities, water crates are now an everyday item found in almost all types of building projects. When correctly installed, plastic soakaways are vastly more efficient than their hardcore predecessors.
The following guide will help you to decide how and where to install your soakaway.
Location
Firstly, to ensure that the soakaway works efficiently, it should be sited in sandy or loamy soil. We would not recommend installing a soakaway in a clay soil as clay does not allow water to drain through it. The ideal site is in ground that is at a lower level than that of the building, or at very least on the same level. You should also ensure that the site is at least 5m away from the building to avoid any possible undermining of the foundations.
Size
The design of a soakaway depends on many factors, such as catchment area, consequences of flooding, permeability and foundation design which are different at each site. As such they should ideally be designed by a civil engineering consultancy and the design checked by your Local Authority if your soakaway is part of an extension or new build project.
If you are constructing a modular soakaway to replace your old hardcore version, a good rule of thumb is that a modular soakaway of 1 cubic metre (that is measuring 1m x 1m x1m) will be sufficient to drain a roof with a surface size of 50 square metres.

Pre-Filters
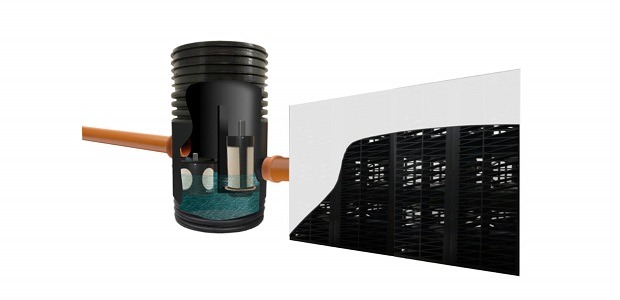
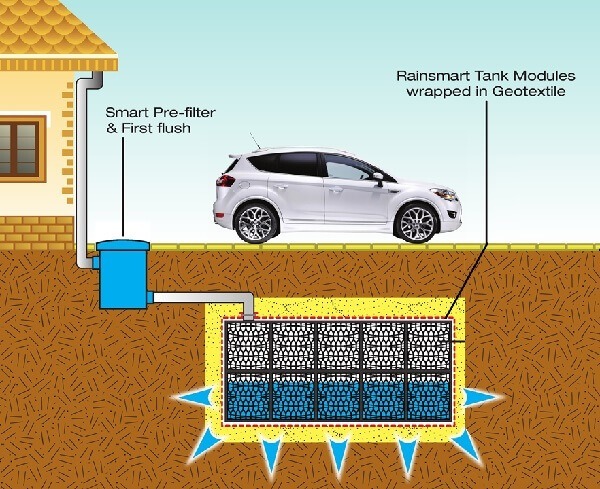
Installing a pre-filter before a soakaway is always a precaution that we would advise you to consider. Whilst geotextile membrane prevents soil from the surrounding area being washed into the soakaway, there is always the possibility that the stormwater pipe itself will carry silt and other debris washed in from the roof and gutters.
A good silt filter trap is easy to maintain and will certainly prolong the life of the soakaway.
Soakaway Depth
Our most popular soakaway is the Rainsmart Ellipse Double Tank Module (900004M3). The crates themselves have a depth of 860mm, but you should allow for 150mm base, side and top fill, plus a minimum additional 150mm top cover for garden applications (350mm for light traffic applications. This gives a total depth of 1310mm for garden applications or 1510mm for light traffic applications.
 If you have a particularly high water table or if you would simply prefer to install a more shallow soakaway, check out our Shallow Dig Options 90003F and 90003FV2. The depth of the crates in these option are only 440mm and even allowing for the base, side and top fill the total depth is 890mm for garden applications or 1090mm for light traffic applications.
In heavier traffic applications when using our 65 Tonne Heavy Crates, the amount of top cover varies depending upon the type of traffic above. For car parks with vehicles up 9 Tonnes we recommend a minimum cover depth of 1m. For specific advice on cover depths for heavier loadings / HGV’s please contact us.
Purchasing the Crates
The next thing to do is to source the soakaway crates themselves. They come in a range of sizes, but 1 cubic metre is the most popular size for a domestic soakaway. There are generally two classes of crate, one for use in gardens which has a 24 tonne vertical load bearing capacity and the other for use in driveways or areas where vehicles may pass over the soakaway. The latter has a vertical load bearing capacity of 65 tonnes.
Excavating the site
Take your time and dig the hole out methodically and carefully. If you are siting the soakaway in a garden, remove the turf carefully as you can use it again when the installation is complete.
For our standard Rainsmart Ellipse 1 cubic metre option you will need to dig a hole that is 1730mm long x 1100mm wide and 1310mm deep for garden applications (1510mm for light traffic applications). This allows for a 150mm base layer of sharp sand, 150mm of sand or gravel sidefill all around the outside of the crates. Above the crates we recommend a 150mm sand/gravel layer and a further 150mm – 350mm of backfill depending upon the application. Try to ensure that the sides and bottom of the excavation are straight and square. If possible we would recommend hiring a mini-digger to carry out the excavation, as digging a hole of this size by hand is a strenuous task.
Installing the Crates
The crates are held together temporarily with cable ties or clips depending upon the type of system. This is purely to hold the crates in position whilst the side file is shoveled into the excavation – no ties or clips are ever used to serve any structural purpose in a soakaway design. All of our cubic metre sets include ties or clips.
A 150mm base layer of sharp sand should be laid in the base of the excavation – the soakaway crates will sit on this.
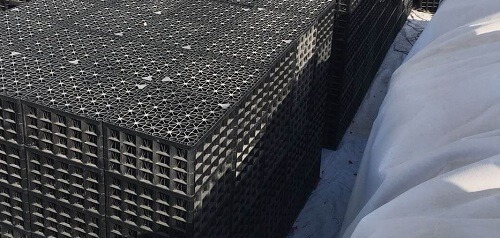
All outer faces of the crates should be wrapped in non-woven geotextile membrane. This is a membrane that allows water to permeate through into the void whilst preventing any soil particles from being washed in. This is crucial to the long term integrity of the soakaway; failure to protect the installation with membrane will drastically reduce the efficiency and the useful life of the installation. Our cubic metre soakaway sets all include sufficient membrane for this purpose.
 You can either wrap the crates as a whole once you have connected them together, or it may be easier to place the membrane centrally over the pit and gradually lower the crates down on top of it, allowing the membrane to be pushed down by the weight of the crates. If you choose this method, draw the membrane up carefully around the sides to make sure that you do not leave any gaps.
Once the wrapped crates have been lowered into the pit, the soakaway is then connected to the surface water drainage system. Depending upon the system, the stormwater pipe is generally introduced into the side of any of the crates using pre-formed knockout sections or pipe entry points, although it can be butted up to the side of the crates. If butting the pipe up it should be immediately supported by the side fill and, for best practice, a small amount of readymix concrete poured around the joint. Domestic soakaways are usually be used in conjunction with 110mm or 160mm pipe, or even with 100mm flexible land drain if required.
When making the pipe connection, it is crucial to ensure that it is completely surrounded by geotextile membrane. The membrane should first installed over the whole structure and then a small cross should be cut in the membrane in the centre of the entry point with a sharp knife. Carefully peel back the membrane, insert the pipe and tape or clamp the membrane tightly around the outside of the pipe to stop the ingress of any soil particles .
Backfilling
The soakaway should be backfilled using 150mm of sand or pea shingle all around the sides and above the top of the crates. A further amount of a minimum of 150mm of the soil that was excavated can then be shovelled back in and firmly tamped down – this will minimise any depressions caused by ground settlement. This is the minimum cover required for soakaways installed in a garden – in light trafficked areas this soil layer should be increased to 350mm on top of the 150mm sand/gravel layer.
Finally, replace the turf that was removed and press it firmly into place. If in the days following the excavation any depressions do appear, simply sprinkle a little topsoil into the hollow and the grass will grow through in due course.
As previously stated, in heavier traffic applications when using our STM 65 Tonne Crates the amount of top cover varies depending upon the type of traffic above. For car parks with vehicles up 9 Tonnes we recommend a minimum cover depth of 1m. For specific advice on cover depths for heavier loadings / HGV’s please contact us.
Items you will need
- Rainsmart Ellipse Shallow Soakaway Set Flat-Packed 1 Cubic Metre - Option 1£226.37 £271.64 £251.52 £301.82 Save 10%
- Rainsmart Ellipse Soakaway Set Shallow Flat-Packed 1 Cubic Metre - Option 2£226.37 £271.64 £251.52 £301.82 Save 10%
-
-
- Rainsmart Ellipse Soakaway Set Flat-Packed with Silt Trap & Lid 1 Cubic Metre£444.52 £533.42 £493.91 £592.69 Save 10%
- Rainsmart Ellipse Soakaway Set Assembled with Silt Trap & Lid 1 Cubic Metre£482.36 £578.83 £535.95 £643.14 Save 10%
- Rain Bloc 60 Tonne Soakaway and Attenuation Set - 0.9 Cubic Metre£210.14 £252.17 £233.49 £280.19 Save 10%
- Rain Bloc 60 Tonne Soakaway and Attenuation Set with Silt Trap & Lid - 0.9 Cubic Metre£501.27 £601.52 £556.97 £668.36 Save 10%
- Rain Bloc 60 Tonne Soakaway and Attenuation Crate - 0.3 Cubic Metre£70.06 £84.07 £77.84 £93.41 Save 10%
-
-


